Google Search Console is free, powerful, and used globally by over 40 million webmasters. Surely, there’s a reason for the tool’s success.
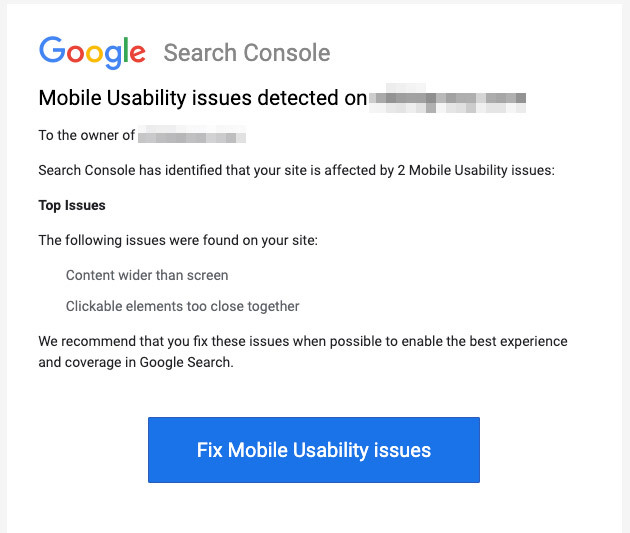
Google Search Console is a powerful free tool created by Google to help website owners understand how Google views their site. It provides essential marketing data that you should pay attention too routinely. It also alerts you to any concerning errors, security issues, and indexing problems that may affect your website’s search rankings.
All of which you can then use in your SEO strategy to boost your website traffic.
Many businesses don’t know how to take full advantage of the power of Google Search Console. In fact, most believe that by just connecting a website to the search console is enough. In truth, that’s a necessary first step, but nothing more.
There’s so much more that you can do with this tool!
Adding your website to Google Search Console
This is the very first step towards growth and is simple and will only take a few minutes. Go to Google Search Console website and click on the Start Now button, then sign in using a Google Gmail account.
Once logged in, enter your website URL and use URL Prefix method for site verification. Make sure to enter the correct URL of your website if in case you are unsure then simply log in to your word press admin area and go to Settings> General page and there you will see your website’s URL in the site address field.
After entering your address, click on the “Continue” button. Next, you will be asked to verify ownership of your website, and then you will need to add the code to your word press website so that Google can verify your ownership.
After that, move forward and enter the code you copied earlier from Google Search Console into the “Google Verification Code” box. Don’t forget to click on the “Save Changes” button to store your changes.
You can then go back to Google Search Console settings and click on the “Verify” button. That is all, you have successfully added your sites to Google Search Console. You then click on the “Go To Property” link to visit your Google Search Console dashboard.

Adding an XML Sitemap
An XML sitemap could be a method for website owners to tell search engines about all the concerning pages on their website. While it doesn’t offer you a lift in search rankings, it can help search engines index your content more efficiently.
If you install AIOSEO (All In One SEO) in the first step, then the plugin automatically adds an XML sitemap to your site. To see the sitemap, head over to AIOSEO >Sitemaps and make sure that toggle for ‘Enable Sitemap’ is switched on. Then the plugin will automatically generate an XML sitemap for your website.
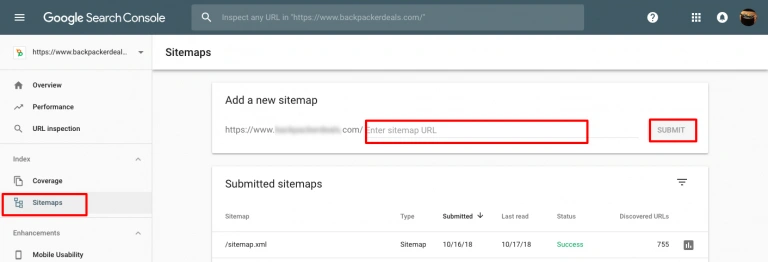
After this, head over to the Google Search Console dashboard and then click on the ‘Sitemaps’ option from the left column. Then paste the URL and click the ‘Submit‘ button.
The AIOSEO only works on WordPress powered sites (of course) and has been known to slow your site down.
Thankfully, you have other options. You may choose instead to use a service such as Pro-Sitemaps.com or use an automated all-in-one service like Akzis.shop that creates, updates, and manages your sitemap for you.
Regardless of which options you choose, make sure you have a readily available and continuously updated sitemap.
Google Search Console will now check your sitemap and use it to boost your website’s crawling.

Linking Google Search Console to Google Analytics
This provides you with a brand-new perspective on your top-performing content and keywords. You need to install Google Analytics on your word press website, and it will automatically show your top keywords from Google Search Console in your word press admin area.
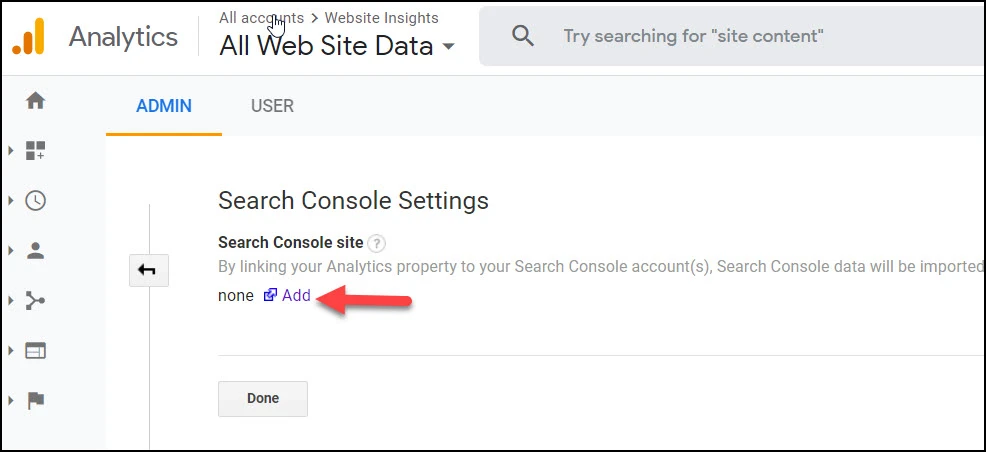
Then head over to Google Analytics dashboard for your website, click on the ‘Admin’ button and then the ‘Property Settings’ section followed by the ‘Adjust Search Console’ button.
On the next screen, you need to click on the Add button to select your website and select the property you want to link to Google Analytics from the dropdown menu.
After that, you’ll need to select that Google Analytics property you would like to connect with the search console and click the ‘Continue’ button.
You have then successfully connected your Google Search Console data to your analytics account.
You can go back to Google Analytics, Search Console settings page to see the connected search console and click the ‘Save’ button.
You can now view the newly uncloaked search console reports in your Google Analytics account under the acquisition report.
Finding and Fixing Search Indexing Issues
One of the most helpful features of Google search console is that you can troubleshoot indexing errors. You can easily detect these errors under the Coverage Report. It shows you which pages from your website are assorted by Google and which pages resulted in an error or a warning. After then, scroll down, and you will see a list of the errors.
A few common indexing errors are:
404 error – this error means that the crawler followed a URL and saw it
Soft 404 error – this error occurs when the crawler sees a 404 error page, but the page’s status code is sending a 200 success message to the browser
Server Error – this means that your website server timed out or did not respond. This could happen if the website was under heavy traffic, under maintenance, or unavailable
Not followed – this error occurs when Google is not able to follow a content type. This could be a flash JavaScript, iframe, or other resources that the crawler cannot fetch.

Now we have covered the technical bits, let’s go to the fun part of growing your website traffic by utilizing the data available in the search console. It helps you uncover keyword data, find out your top-performing keywords, and discover hundreds of potential keywords where you can easily rank and get more traffic.


